Friday, January 24, 2014

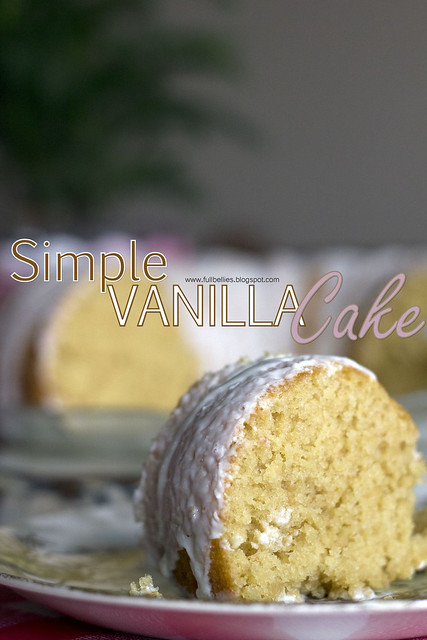
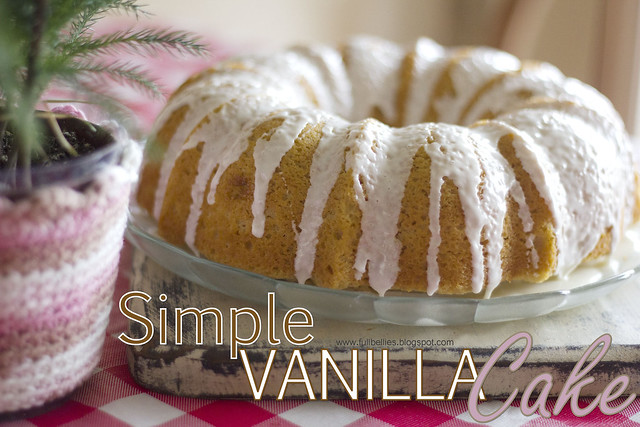
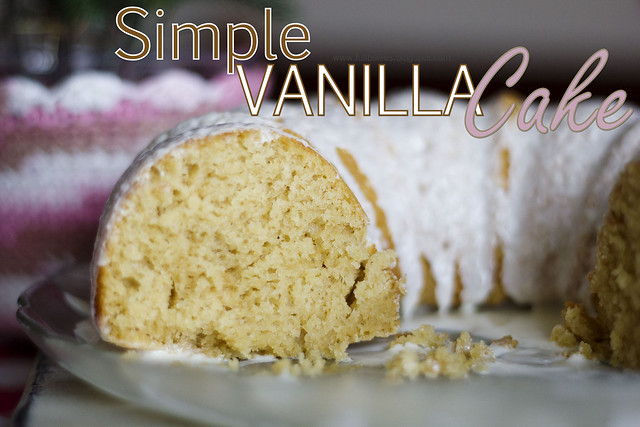
Simple Vanilla Cake

_MG_1535

Growing up, some of my fondest memories revolve around the time my grandparents lived with us.

We always had a special bond with our grandfather, not only because we thought he was the coolest man on earth but it may have also been the fact that, at the drop of a hat, he would walk into the kitchen and whip up a simple cake.

Midnight???  Doesn't matter.  If the kids wanted cake, he would make one and then we would all sit up giggling and enjoying the slice of cake still warm from the oven.  It felt like we were sharing a secret, or part of some club that no one else was invited to.

His cakes were never difficult to make, they never included special ingredients, just plain ol' flour, eggs, sugar and milk, and to this day my favorite cakes are the easy simple ones.

This recipe is not the one my grandfather used, but it's pretty close. 

_MG_1528

Simple Vanilla cake
Source:  Baking Bites
Serves 8-10

2 cups all purpose flour
2 tsp baking powder
1/2 tsp salt
1/2 cup butter, room temperature
1 1/4 cups sugar
2 large eggs
2 tsp vanilla extract
1 cup milk

Preheat oven to 350F. Grease and flour a 9×5-inch loaf pan.

In a medium bowl, whisk together flour, baking powder and salt.
In a large bowl, cream together butter and sugars until light and fluffy. Beat in eggs, adding them one at a time, followed by vanilla extract. Stir in half of the flour mixture, followed by the milk. Add in remaining flour mixture, stirring just until no streaks of dry ingredients remain. Pour into prepared pan.

Bake for 50-55 minutes, or until a toothpick inserted into the center of the cake comes out clean.
Allow cake to cool in the pan for 5 minutes, then turn it out onto a wire rack to cool completely.

Makes 1 loaf.

_MG_1529

Wednesday, January 08, 2014

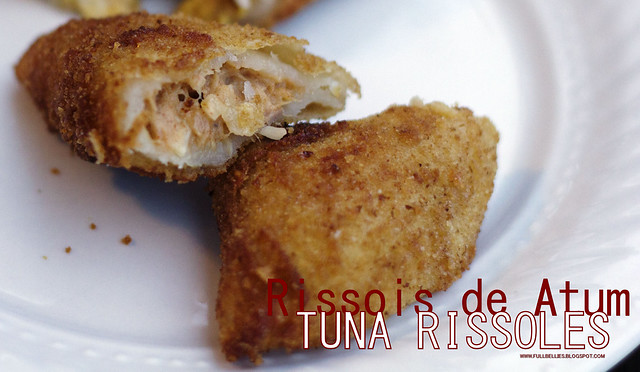
Rissois de Atum - Tuna Rissoles

These are so easy to make.  I'm giving you the recipes for the filling because you already know how to do the dough, and if you don't, just check out the recipe which I've posted before.

The filling can be either chicken, beef, shrimp or tuna, and yes there are many different variations on how you make the filling, I think it's all up to individual taste.

This is how I make the tuna filling.

Rissois de atum

Rissois de Atum

Dough for the rissoles
2 cans of tuna, drained
1 teaspoon olive oil
1 small onion, finely chopped
paprika
salt and pepper
flour
heavy cream

In a medium saucepan, add the onion and the olive oil, saute for a few minutes until translucent.  Add in the tuna and season with paprika, salt and pepper to taste.  (At this point, you can add some tomato paste if you wish, but for this one I didn't because the paprika was enough).

Mix well, then sprinkle in some flour.  I don't have an exact measurement, I eyeball it, but I would say about a tablespoon, just enough to thicken it.  Pour in some heavy creamy and stir well until creamy and smooth.  If you want it a little thicker then add in a little more flour, and if it's too thick, then add in a little more cream.

Proceed to make the rissoles as shown in the link above.

Enjoy :)

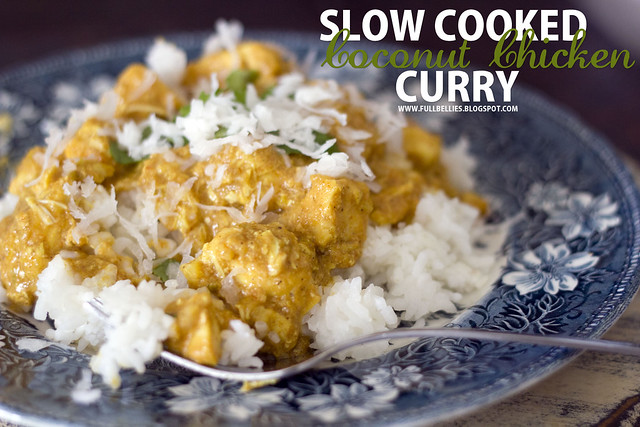
Slow Cooker Coconut Chicken Curry

Slow cooked coconut chicken curry

Chicken Curry, or any curry for that matter is something my family really enjoys.

I grew up enjoying big family dinners with very spicy curry, and anything from chicken to beef to shrimp and my favorite CRAB curry.  Oh my goodness, I haven't had that in forever.

I do have a few curry recipes here on the blog, including one for the crockpot, but this one I'm sharing today is a new one.

What caught my attention was that except for the chicken, every other ingredient is thrown in a food processor and blended before being poured over the chicken and then cooked on low.

I don't think I have to tell you how amazing it smells while it's cooking.  *drool*

This one is perfect for a busy winter day, and knowing all the cold weather some of you are enduring, there's nothing like popping this in in the morning and enjoying a nice, hot, filling meal at dinner time.

It got a huge thumbs up from the whole family, so it will go on the Favorites List.

Slow cooked coconut chicken curry
Slow Cooker Coconut Chicken Curry
Source: Tasty Kitchen

2 pounds, 3-⅓ ounces, weight Boneless Skinless Chicken Breast, Cut Into Large Cubes
1 whole Onion, Peeled And Halved
2 cloves Garlic, Peeled
1 whole Small Green Bell Pepper, Seeded And Quartered
1 can (156ml Can) Tomato Paste
1 can (about 400ml Can) Coconut Milk
1-½ teaspoon Salt
1 Tablespoon Curry Powder
1 Tablespoon Garam Masala (Indian Spice Mix)
2 whole Dry Red Chili Peppers (optional For Extra Heat))
2 Tablespoons Water
1-½ Tablespoon Cornstarch
1 bunch Coriander (optional, For Decoration)

1. Place chicken cubes inside the slow cooker.

2. Place therest of the ingredients (except chili peppers, cornstarch, water and coriander) in a food processor bowl and process together until the mix is smooth(ish). Pour sauce mix on top of the chicken, mix well, add hot peppers if using any, then close the lid. Cook on low for 6 hours.

3. An hour before serving, mix together water and cornstarch until the cornstarch is completely disolved. Add to the chicken curry and mix well. Place the lid back on for the rest of the cooking time.

4. Serve on top of steaming white rice, something wonderfully aromatic like jasmine or basmati rice. Decorate with lots of chopped coriander. Inhale. So good!

Slow cooked coconut chicken curry

My favorite way of eating curry, includes a big sprinkle of coconut. YUM!

Tuesday, January 07, 2014

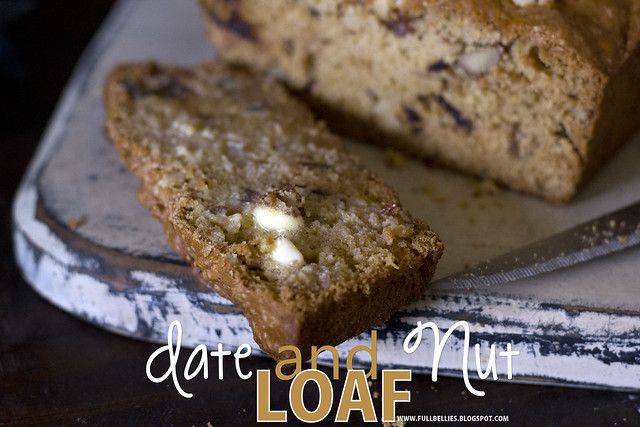
Date and Nut Loaf

Date and Nut Loaf

Well, hello everyone. I'm sure you've been wondering where I've disappeared to.

Truth is that life got in the way the past 6 months and I have found myself struggling to keep afloat. Cooking has sort of taken the back burner in my life, not that I mean we don't eat or I don't cook, I still do, but I haven't really tried anything new or made anything that hasn't already been shared on the blog.

Boring....totally, but I'm ready to jump back in the kitchen and start getting this blog back on track.

To start, I am going to be sharing with you the BEST Date and Nut Loaf ever. I have always loved a good date loaf but haven't found the best recipe, though I did try quite a few.  Then I decided to look through one of my most loved food blogs, The English Kitchen and low and behold, Marie had a recipe.

So simple, so easy, that I was wondering if it would live up to it's expectations.  Boy was I in for a treat.  I now make this loaf at least once a week because it's become one of the family's favorites, especially when you slather on some butter.

Right...let's get on to the recipe and I do hope you enjoy it :)

Date and Nut Loaf
*Mrs R's Date and Nut Loaf*
Makes one 8 by 4 loaf


A moist and delicious loaf to serve with tea.

1 cup dates, chopped (170g)
3/4 cup boiling water (6 fluid ounces)
1 tsp bicarbonate of soda
2 TBS butter
3/4 cup sugar (145g)
1 large free range egg
1 tsp vanilla
1 3/4 cup flour (150g)
1/2 tsp salt
1/2 cup chopped walnuts (60g)
several whole walnuts to decorate

Preheat the oven to 160*C/325*F/ gas mark 3. Butter and flour an 8 by 4 inch loaf tin. Set aside.

Put the dates into a bowl. Pour the boiling water over top and add the soda. Mix, cover and let stand until the mixture cools.

Cream together the butter and sugar until light and fluffy. Beat in the egg and vanilla. Stir in the flour and salt, then add the cooled date mixture. Stir in the chopped walnuts Don't over mix. Spread in the prepared loaf tin. Smooth over the top. Place a few whole walnut halves on top in a decorative manner. Bake for 1 hour or until well risen and a toothpick inserted in the centre comes out clean. Allow to sit in the pan for 5 minutes, before tipping out onto a wire rack to finish cooling completely.

Store covered in an airtight container. This tastes even better the next day. We like it sliced and spread with softened butter.

Date and Nut Loaf